1. Rubber Band Powered Cars
Rubber Band Powered Car Challenge: Roll the Longest Distance!
Welcome, future innovators! Have you ever considered the invisible forces that govern motion, or how a simple elastic band can become a powerful engine? This challenge invites you to dive into the world of engineering design, where you’ll harness these principles to create a vehicle powered solely by rubber bands. Your ultimate goal: design and build a car that travels the farthest distance possible. Prepare to explore, experiment, and discover the elegant interplay of physics and practical design!
The Challenge: Engineer a Long-Distance Rubber Band Racer!
Your task is to conceptualize, construct, and refine a rubber band-powered car designed for maximum travel distance. Ponder how each material can be optimally utilized to achieve efficiency, stability, and powerful propulsion.
Materials You’ll Need:
-
Cardboard
-
Paperclips
-
CDs
-
Pencils
-
Tape (masking tape or scotch tape)
Hot glue guns
-
Straws (for axle supports)
-
Rubber bands
-
Scissors
-
Ruler or measuring tape (for testing)
Your Mission: Inquiry, Design, Iteration!
Conceptualize & Sketch: Begin by exploring possible designs. How will the elastic potential energy of the rubber band be converted into kinetic energy for your car? What structural forms will provide the most efficient transfer of this energy? Consider different wheel-to-axle connections and how they might impact motion. Document your initial thoughts and sketches; these will be your blueprints.
Strategic Material Use: Gather your chosen materials. Before you cut or assemble, consider the properties of each material. How can cardboard provide structural integrity? What role will pencils play beyond just axles? How can the CDs be optimized for traction and smooth rolling?
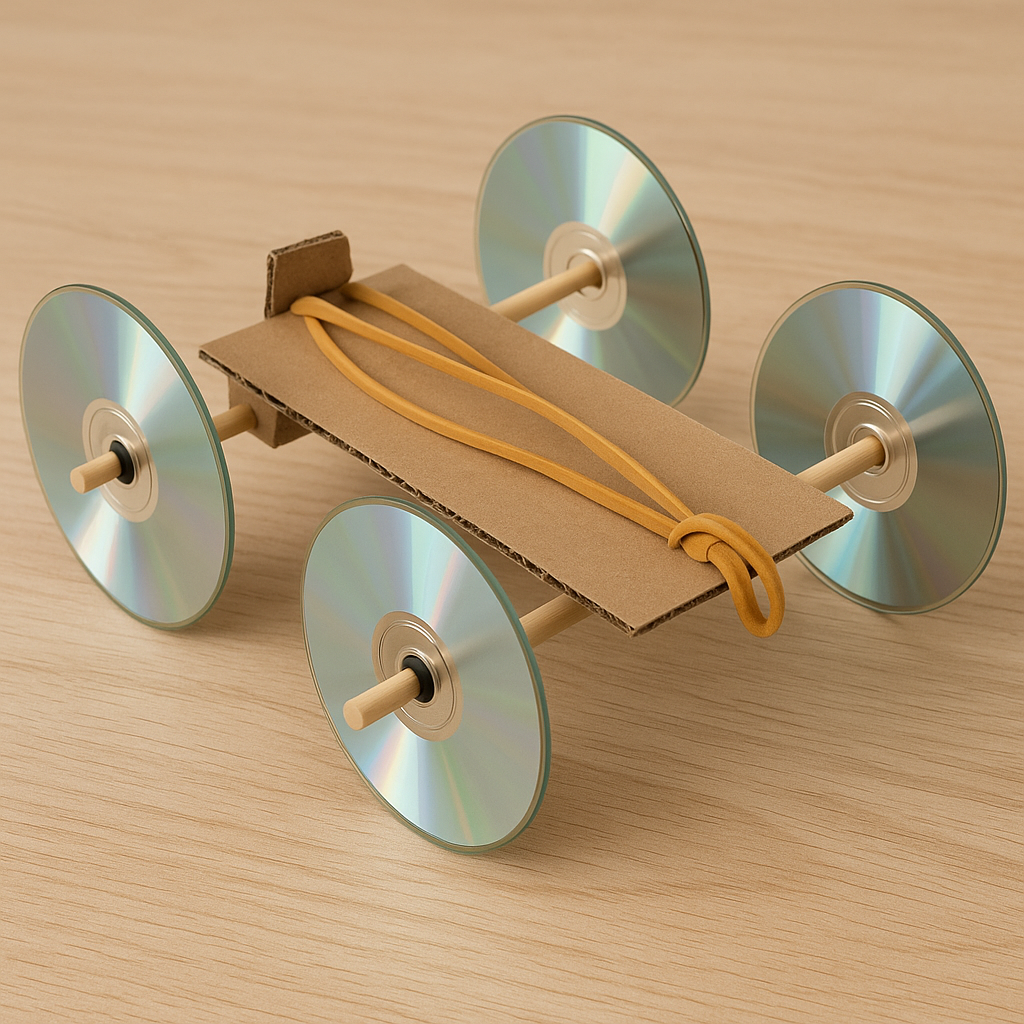
From Concept to Prototype: Now, translate your design into a physical model.
Frame Stability: How will you construct a robust and lightweight frame that provides a stable foundation for your car’s components?
Axle Integration: What is the most effective method for securing your axles to the frame, ensuring minimal friction while allowing for free rotation? How will the straws facilitate this?
Wheel Dynamics: How will you firmly attach the CDs to the axles? What strategies can you employ to ensure the wheels achieve optimal grip on the testing surface and roll smoothly?
Propulsion Mechanism: This is the core of your design. How will you configure the rubber band(s) to store and release energy most effectively? What mechanical advantage can you create to maximize the force applied to the wheels? Will a direct drive, a lever, or another mechanism best suit your design?
As you build, continuously evaluate: “Does this component contribute to our goal of maximizing distance?”
Test & Analyze: Set up your testing environment with a clear, flat surface and a distinct start line. Release your car and observe its performance. Precisely measure the total distance traveled.
Reflect & Refine:
Analyze your initial test results. What forces were at play? Where might energy have been lost?
Based on your observations, what specific modifications could enhance your car’s performance? Consider variables such as wheel diameter, mass distribution, number and tension of rubber bands, and the reduction of friction.
Implement your improvements and re-test. The iterative cycle of design, build, test, and refine is fundamental to engineering innovation.
Rules for Success:
To ensure a fair and insightful challenge, adhere to these guidelines:
You must build a vehicle with a frame, at least one axle, and at least one wheel.
The car must be a single device. No parts of the car can intentionally or unintentionally detach, fall off, or otherwise separate during the test.
The car must be powered entirely by one or more rubber bands. No other sources of forward force or movement, such as pushing or blowing on the car, are allowed.
All rubber bands that power the car must be pulled/twisted/tightened, etc. by hand by up to two people. No additional external tools or sources of leverage that are not part of the car (wrenches, power drills, etc.) are allowed to help tighten the rubber band.
The test must be conducted on a flat surface. Any surface (carpet, wood, concrete, etc.) is acceptable.
A straight start line must be marked on the floor, using any material that will not create a bump or impede the car’s motion (tape, chalk, etc.). The car must start completely behind the start line.
After the car has been released, no one can touch the car, and it cannot touch or bump into any objects, until it comes to a complete stop on its own.
After the car has come to a complete stop, distance is measured from the point on the start line directly in front of where the car started to the closest point on the car.
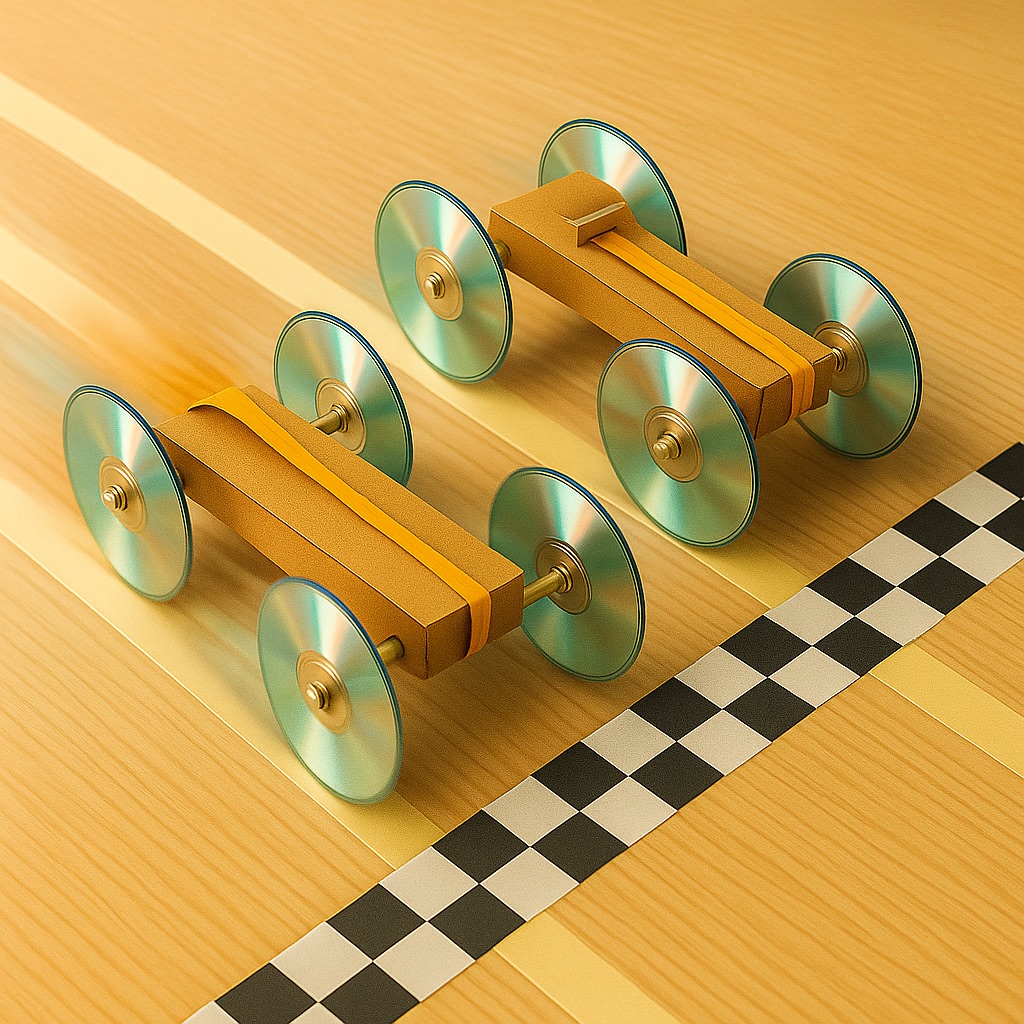
Race Day!
After you’ve had a chance to refine your car, it’s time to see how your design stacks up against others! A friendly competition can be a great way to celebrate your engineering efforts and learn from each other’s innovations.
How to Race:
Design Showcase: Before the race, take a moment to look at each other’s cars. What unique design choices did others make? Discuss what you think might work well or present a challenge for their vehicle.
Official Launch: When it’s your turn, follow all the “Rules for Success.” Ensure your car is behind the start line, wind up your rubber band(s), and release!
Measure & Record: Precisely measure the distance your car travels according to Rule #8. Keep a record of each car’s best distance.
Analyze the Results: After all cars have run, discuss as a group:
Which car traveled the farthest? Why do you think that particular design was so successful?
Were there any unexpected outcomes? What might have caused them?
What new ideas did you get from seeing other designs in action?
This race isn’t just about who goes farthest; it’s about applying your knowledge, learning from observation, and pushing the boundaries of your design!
STEM Connections & Career Pathways:
This inquiry-based activity provides a tangible exploration of crucial STEM principles:
Engineering Design Process: You are actively engaging in the iterative engineering design cycle: defining problems, brainstorming solutions, designing, building, testing, and improving. This is a core skill for any engineer.
Physics of Motion & Energy: You’ll directly observe and manipulate concepts such as:
Potential Energy: The stored energy in the stretched or twisted rubber band.
Kinetic Energy: The energy of the car in motion.
Energy Transfer & Conversion: How potential energy transforms into kinetic energy.
Friction: The opposing force that slows your car. How can you minimize it?
Newton’s Laws of Motion: How forces applied result in acceleration, and how every action has an equal and opposite reaction.
Mathematics & Data Analysis: Measurement, data collection, and analysis are vital for comparing designs and understanding performance improvements.
Materials Science: You’ll gain practical experience in selecting and applying materials based on their properties (e.g., rigidity of cardboard, low friction of straws, elasticity of rubber bands).
Understanding these principles is foundational for a wide array of university fields and exciting careers, including:
Mechanical Engineering: Designing and analyzing mechanical systems, from robotics to automotive components.
Aerospace Engineering: Focusing on the design and construction of aircraft and spacecraft, where efficiency and propulsion are paramount.
Industrial Design: Blending art, science, and technology to create functional and aesthetically pleasing products.
Materials Engineering: Developing new materials and improving existing ones for specific applications.
Physics Research: Investigating fundamental laws of the universe, including energy and motion.
Embrace the challenge, ask questions, and let your curiosity guide your design!