Part 1: Crime Scene Simulation
Part 2: Engineering and Design
Afternoon Activities
3. Glow and Flow Flexible Circuits
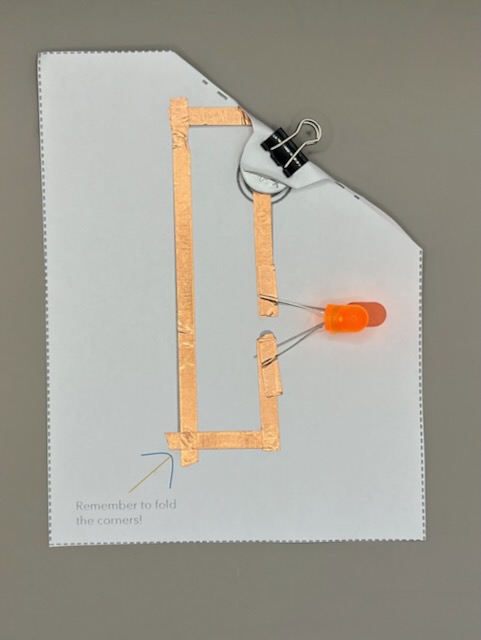
Part 1: Paper Circuits – Light Up a Message! 💡💌
Your Goal: Create a card or paper craft with a working LED light. Make it Mean Something: Design it for someone special or to share a positive message. (Think: Electrical basics, Design, Interactive Art)
Materials:
- Cardstock/paper
- Copper tape
- LEDs
- 3V coin cell battery (e.g., CR2032)
- Clear tape, scissors, decorating supplies
Let’s Build:
- Design: Who is it for? What will it look like? Where will the light go? Sketch your idea.
- Plan Circuit:
- Battery: + and – sides. LED: long leg (+) & short leg (-).
- Draw two copper tape paths: One from battery (+) to LED (+), another from LED (-) to battery (-).
- Optional Switch: How can you make a break in the circuit that you can close to turn it on? (e.g., a flap, or pressing the battery down).
- Construct:
- Stick copper tape firmly along your planned paths.
- Attach LED: Bend legs flat. Place longer (+) leg on the positive path, shorter (-) leg on the negative path. Secure legs with more copper tape.
- Add Battery: Ensure correct sides touch the copper tape paths. A small paper flap or tape can hold it.
- Test & Fix: Light on? Great! No light?
- Battery direction? LED legs correct? All tape connections tight?
- Decorate & Share! Add your artistic touches.
Use this link to learn how to take your card to the next level by integrating a switch, just like those cards that light up or make noise when opened
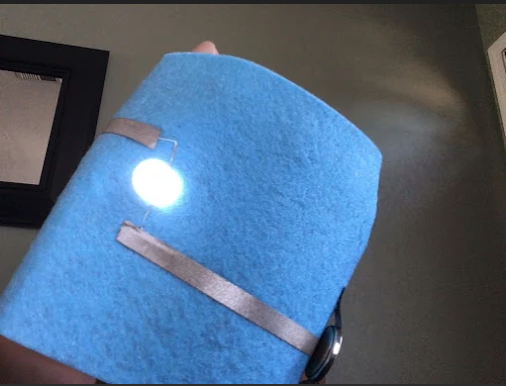
Part 2: Wearable Circuits
Activity 2: Wearable Circuits – Shine a Light on Your Cause! ✨🧥
Your Goal: Create a simple light-up wearable item (pin, patch, wristband). Make it Mean Something: Represent a cause, your school, or your unique style. (Think: Wearable Tech, E-textiles, Creative Engineering)
Use this link for step by step instructions
Materials:
- Felt pieces
- Copper tape
- LEDs
- 3V coin cell battery & holder (or make a felt pouch)
- Scissors, fabric glue (optional), needle/thread (optional for securing tape), pins/Velcro
Let’s Make:
- Design: What will your wearable represent? Sketch your design, including LED and battery placement.
- Plan Fabric Circuit:
- Plan copper tape paths (+ to LED +, LED – to battery -) on your felt design.
- Fabric Challenge: Press copper tape VERY firmly. Simple, direct paths work best. Consider how to secure the battery (e.g., small felt pocket).
- Build:
- Cut felt shapes.
- Apply copper tape paths, pressing firmly. (Optional: a dab of fabric glue or a few stitches at tape ends can help it stick to felt).
- Attach LED: Bend legs flat. Secure to correct copper paths with more tape.
- Battery: Create a holder (like a felt pouch) ensuring copper tape ends make good contact with the correct battery sides.
- Test & Fix: Does it light up?
- Check all connections: Is copper tape firm against LED legs and battery?
- Finish & Share: Add fasteners. Be ready to tell us what your creation means!
Have fun experimenting and making your ideas shine!