Norco College 2025
Part 1: Microbit and 3d Design Overview
A: Introduction to the Microbit
B: Microbit and AI (ChatGPT)
C: Microbit Design Challenges
D. 3d Design Introduction
Bioluminescence and Magnetoreception Slime
Part 2: Microbit Controller
A: Functional 3D Print (Tinkercad Training)
B. Introduction to Scratch
C: Scratch and the Microbit
D: Controller for Quadriplegic Individuals
Animal Inspired Scribble Bots
Part 3: MakeyMakey Instrument
Marshmallow Challenge
A: Introduction to the MakeyMakey Controller
B: MakeyMakey and Scratch Instrument
C: Scratch and AI (Pictoblox)
D. Instrument for Individuals with Cerebral Palsy
Part 4: AI and Facial Recognition Assistive Technology
Facial Recognition Getting Started
Facial Recognition and Assistive Technology
Part 5: Final Showcase
**Final Showcase**
Previous Lesson
Next Lesson
A: Introduction to the MakeyMakey Controller
Norco College 2025
A: Introduction to the MakeyMakey Controller
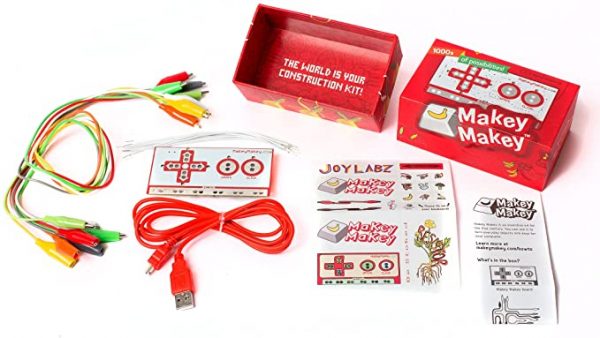
Instructions (Part I):
Open your MakeyMakey kit and and carefully lay out all of the materials. See the below image.
Instructions (Part II): Carefully view the below videos to learn more about how the MakeyMakey!
Instructions (Part III):
Carefully follow along with the below videos to learn how to set up and begin using your MakeyMakey.
Instructions (Part IV):
Carefully study the below video to learn how to create MakeyMakey switches and buttons.
Instructions (Part V):
Carefully study the below video to learn how to use the back side of the MakeyMakey board.
Previous Lesson
Back to Workshop
Next Lesson