Your Goal: Create a card or paper craft with a working LED light. Make it Mean Something: Design it for someone special or to share a positive message. (Think: Electrical basics, Design, Interactive Art)
Materials:
Cardstock/paper
Copper tape
LEDs
3V coin cell battery (e.g., CR2032)
Clear tape, scissors, decorating supplies
Let’s Build:
Design: Who is it for? What will it look like? Where will the light go? Sketch your idea.
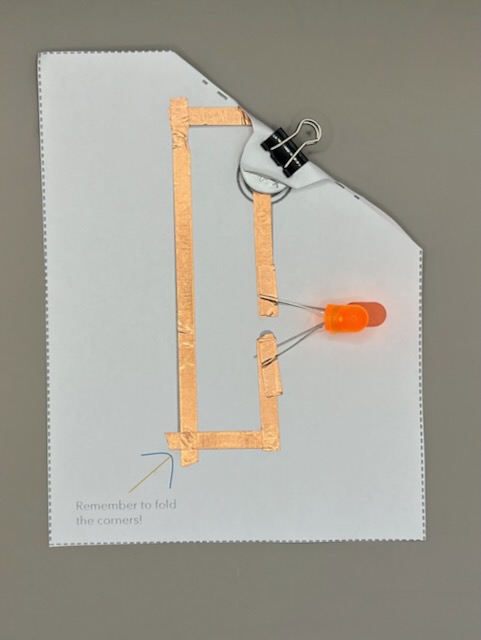
Plan Circuit:
Battery: + and – sides. LED: long leg (+) & short leg (-).
Draw two copper tape paths: One from battery (+) to LED (+), another from LED (-) to battery (-).
Optional Switch: How can you make a break in the circuit that you can close to turn it on? (e.g., a flap, or pressing the battery down).
Construct:
Stick copper tape firmly along your planned paths.
Attach LED: Bend legs flat. Place longer (+) leg on the positive path, shorter (-) leg on the negative path. Secure legs with more copper tape.
Add Battery: Ensure correct sides touch the copper tape paths. A small paper flap or tape can hold it.
Test & Fix: Light on? Great! No light?
Battery direction? LED legs correct? All tape connections tight?
Decorate & Share! Add your artistic touches.
Use this link to learn how to take your card to the next level by integrating a switch, just like those cards that light up or make noise when opened