A. Sonic Design Lab
Activity 1: Singing Plates 🎤✨
Have you ever seen sound? In this activity, you’ll use your voice to create beautiful patterns!
Your Challenge: Work in your group to make different patterns on the Chladni plate by singing or humming into the microphone.
What’s Happening? Sound is a vibration. When you sing into the microphone, those vibrations are sent to the plate. At certain frequencies (pitches), the plate resonates, meaning it vibrates very strongly in specific areas and not so much in others. The sand or salt on the plate moves away from the strongly vibrating areas and settles in the calm areas, revealing the sound patterns!
Learning Objectives:
- Observe how sound vibrations can create visual patterns.
- Explore the concept of resonance.
- Discover that different pitches (frequencies) create different patterns.
Materials:
- Chladni plate (a thin metal plate)
- Signal generator and speaker/exciter (or a strong microphone connected to an amplifier and speaker placed directly under the plate)
- Fine sand or salt
- Microphone (if not using a signal generator to directly vibrate the plate)
Let’s Do It!
- Set Up: Make sure the Chladni plate is level. Sprinkle a thin, even layer of sand or salt on top of it.
- Warm-Up: If using a microphone, have one person start by humming a low, steady note into the microphone.
- Observe: Watch what happens to the sand on the plate. Do you see a pattern emerge?
- Experiment!
- Try different pitches – go higher, then lower. How do the patterns change?
- Try different volumes (loudness). Does this change the pattern or just how clear it is?
- Can you recreate a pattern someone else in your group made?
- Which notes create the most complex patterns? Which create simpler ones?
- Discuss: Talk with your group about what you’re seeing and why you think the patterns are forming.
- Dynamic Math: Go here to try out this digital Chladni Pattern Generator!
Think About It:
- Where might this phenomenon be used in the real world? (Hint: think about musical instruments or engineering!)
- What do you think would happen if the plate was a different shape or material?
University & Career Connections: Physics, Acoustics, Music Technology, Materials Science, Engineering.
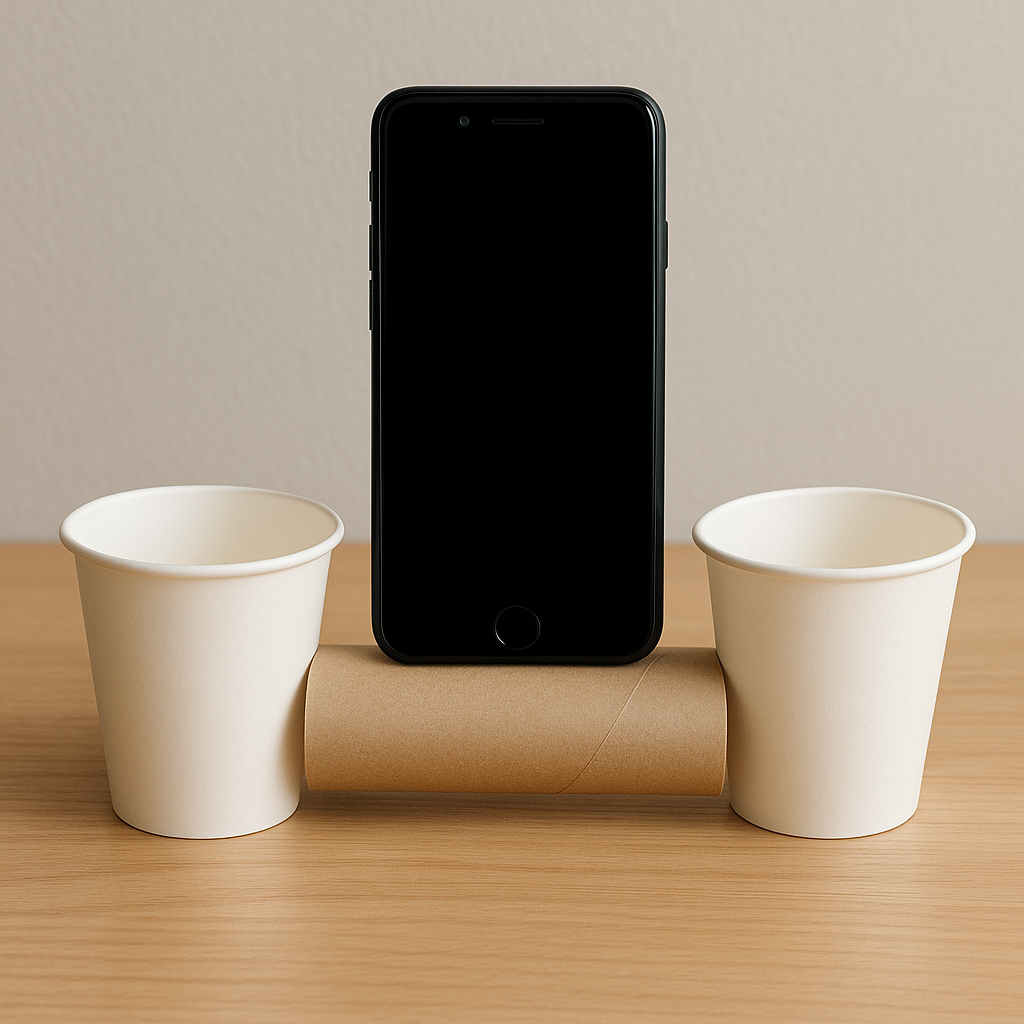
Activity 2: DIY Phone Amplifier 🔊📱
Boost your phone’s sound without any batteries or electricity! Design and build your own passive amplifier.
Your Challenge: Create a non-powered amplifier for a smartphone using everyday materials. Test how much louder it makes the sound using a decibel meter app.
What’s Happening? Passive amplifiers work by directing and concentrating sound waves. Think of it like a megaphone or the way cupping your hand around your ear helps you hear better. The shape of your amplifier can gather the sound waves coming from your phone’s small speaker and guide them in a specific direction, making them seem louder to a listener in that direction.
Learning Objectives:
- Understand how the shape of an object can affect sound direction and amplification.
- Apply design thinking to create and iterate on a functional object.
- Use a decibel meter app to collect and compare sound level data.
Materials:
- Smartphones
- Decibel meter app (search for “Decibel Meter” or “Sound Meter” in your phone’s app store – many free versions are available)
- Various recyclable/craft materials:
- Paper cups (different sizes)
- Plastic bottles (clean and dry, various shapes)
- Thin cardboard sheets (e.g., from cereal boxes, food packaging, old folders, shoebox lids)
- Cardstock or stiff paper
- Cardboard from larger boxes (can be cut down)
- Scissors
- Tape
- Rulers
Let’s Do It!
- Baseline Test:
- Choose a song or a consistent sound to play on one phone.
- Open the decibel meter app on a different phone (to measure).
- Place the measuring phone a set distance away from the phone playing music (e.g., 1 foot).
- Play the sound and record the average decibel level. This is your “before” measurement.
- Brainstorm & Design:
- Look at your materials. How can you create a shape that will capture the sound from your phone’s speaker and direct it outwards?
- Think about horn shapes, cone shapes, or channels. Sketch a few ideas.
- Consider how you can form tubes or cones: You can roll flat cardboard or cardstock into a tube and tape it. You can also cut and fold these materials to create different angled surfaces.
- Build Your Amplifier:
- Carefully cut an opening in your chosen materials for the phone’s speaker to sit in or project into.
- Shape your materials: If using flat cardboard or cardstock, roll, fold, and tape it to create your desired amplifier shape (like a cone or a tube). You can combine these with cups or bottle parts.
- Assemble your amplifier using tape as needed. Make sure it’s stable.
- Test & Measure:
- Place the phone playing music into your amplifier.
- Position the measuring phone at the same distance as your baseline test.
- Play the same sound at the same volume. Record the new average decibel level. This is your “after” measurement.
- Calculate the Difference: How many decibels did your amplifier increase the sound? (A 3 dB increase is about a noticeable difference, a 10 dB increase is about twice as loud!)
- Iterate & Improve (Optional):
- Can you make it louder? Try a different design, different materials, or modify your current one.
- What happens if you change the length, opening size, or shape of the tubes/cones you made? Test and measure again!
- Share & Compare: Show your design to other groups. What worked well? What didn’t? What construction techniques were effective for making tubes or horns?
Think About It:
- Why do some shapes amplify sound better than others?
- Where else do you see passive amplification used (e.g., in nature, in architecture, in musical instruments)?
- Could you design an amplifier that directs sound to multiple people?
University & Career Connections: Acoustic Engineering, Industrial Design, Architecture, Physics, Environmental Science (for sustainable design), Prototyping.
Take a photo and share your work below ↓