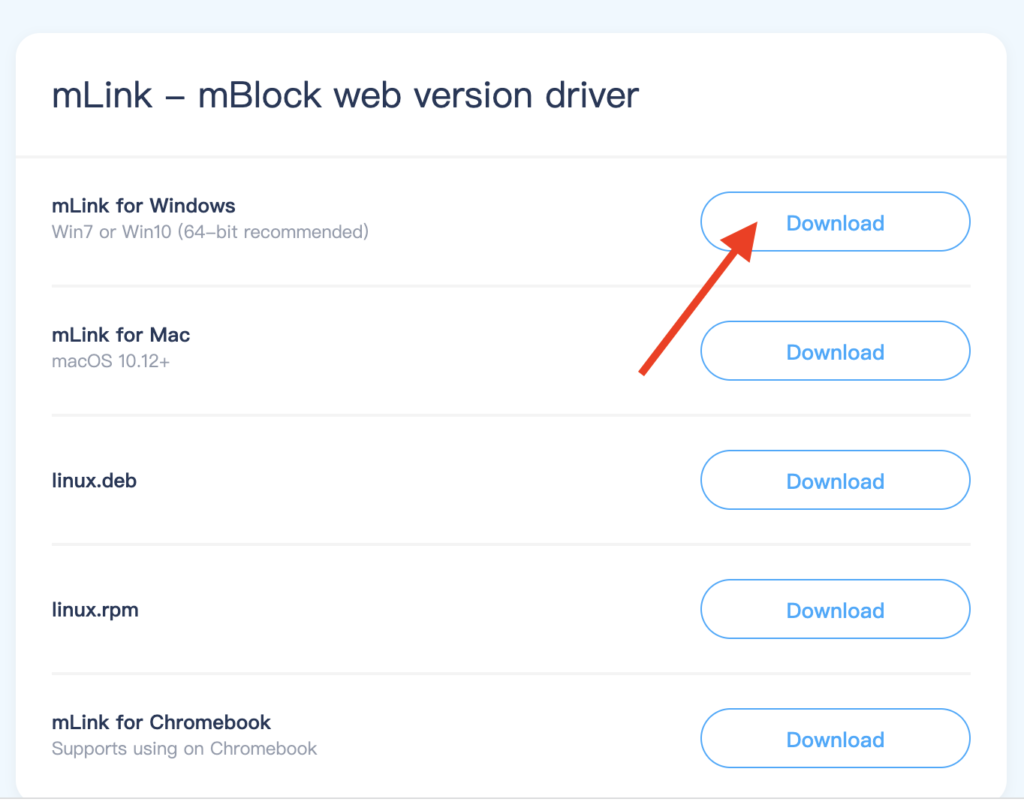
Instructions (Part I): Click here and download the robotic programming application for your Windows computer(“mLink for Windows). See screenshot below.
Instructions (Part II): Carefully view the below general video to learn the basics of the software.
Instructions (Part III): Launch the software and choose the “mBlock block-based editor” option. See screenshot below.
Instructions (Part IV): Plug your bluetooth dongle into the USB port of your computer as shown below.
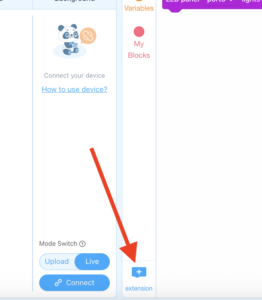
Instructions (Part V): Click here and follow the instructions carefully for connecting to your “Ultimate 2.0” robot using USB and using Bluetooth. Make sure you are able to connect to your robot both ways. See screenshot below for device choice selection.
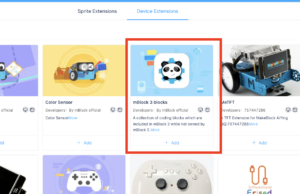
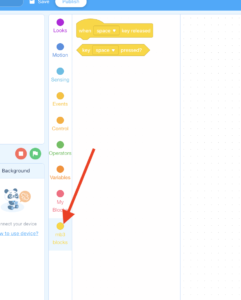
Instructions (Part VI): Once you have chosen your correct device, you must add the “mBlocks 3 Blocks” extension to access all the required programming block options. See screenshots below for extension additions. Clickherefor a short video tutorial on adding the Ultimate 2.0 device and extensions needed to find the blocks shown below.
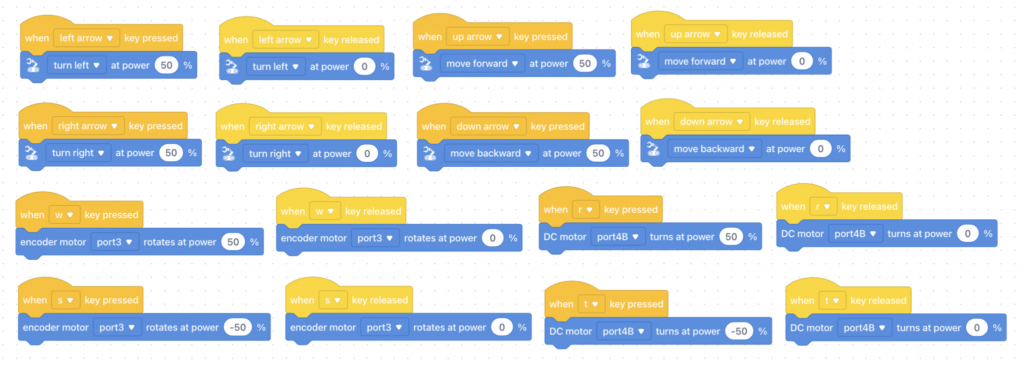
Instructions (Part VII): Reference the above video from “Part I” and recreate the below program which will allow you to remote control your “Robotic Arm Tank”. Again, ensure that you can connect via USB and bluetooth. Alternatively, click here to download the below program which can upload into the program interface.
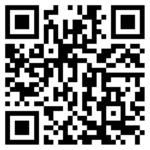
Instructions (VIII): Record a video of you controlling your “Robotic Arm Tank” via bluetooth and and share it below. Type your first name(s) in the “Subject” area. A QR code is provided below for ease of upload.