Part E: Drone Flight (Manual Control)
STEP 1: Now that you’ve learned how to fly using the ESP Drone app, it’s time to transition to the custom WovenDrone application. This new program will give you more control and allow you to experiment with advanced features as you continue improving your drone skills. To get started, download and install the WovenDrone app on your computer by clicking [this] link. Once it’s installed, carefully watch the instructional video below to guide you through the setup process along with basic operation.. Follow the steps closely to ensure the app connects properly to your drone. From this point forward, WovenDrone will be your main flight controller—so take your time getting used to the layout and controls.
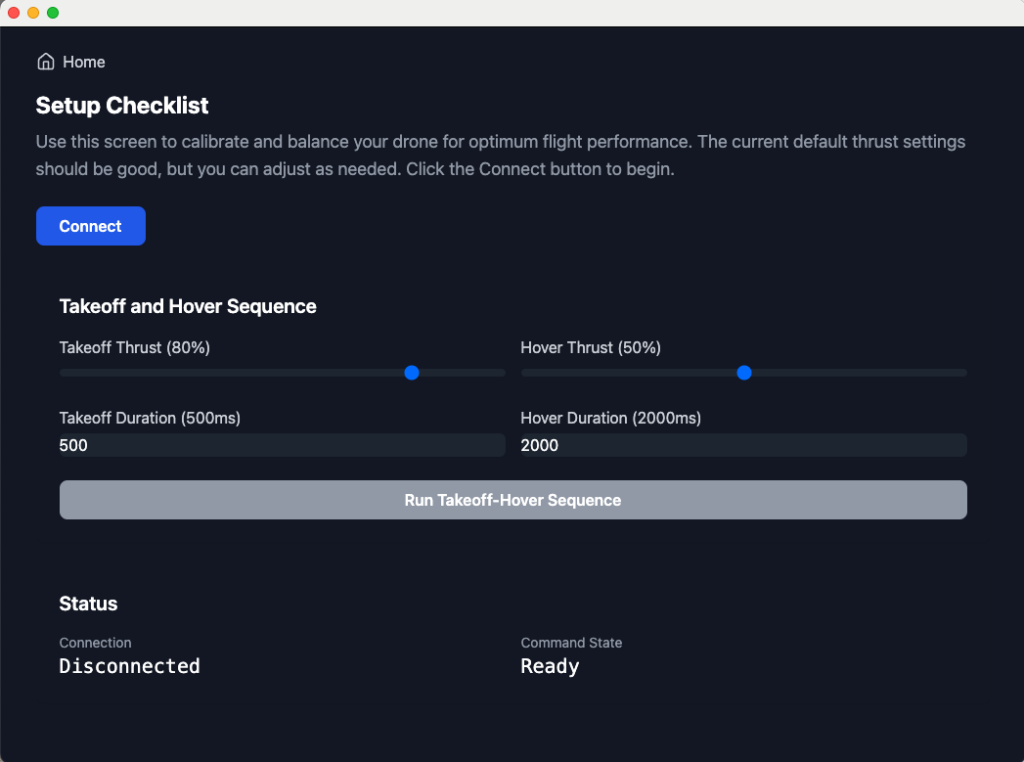
STEP 2: Before you begin manual flight using the WovenDrone app, you’ll need to go through the setup and calibration process (much like you did with the ESP app) to make sure your drone is stable and responsive. On the startup screen of the app, select “Set Up” to enter calibration mode. From there, carefully adjust your thrust settings to match your drone’s behavior—this helps ensure your drone can hover without tipping or overcompensating. Look closely at the values and sliders, and don’t be afraid to test small changes. This step is important for smooth, controlled flight. Once your calibration feels solid, return to the main screen and switch to Manual Control to begin flying. Refer to the images below to guide you through the setup steps.

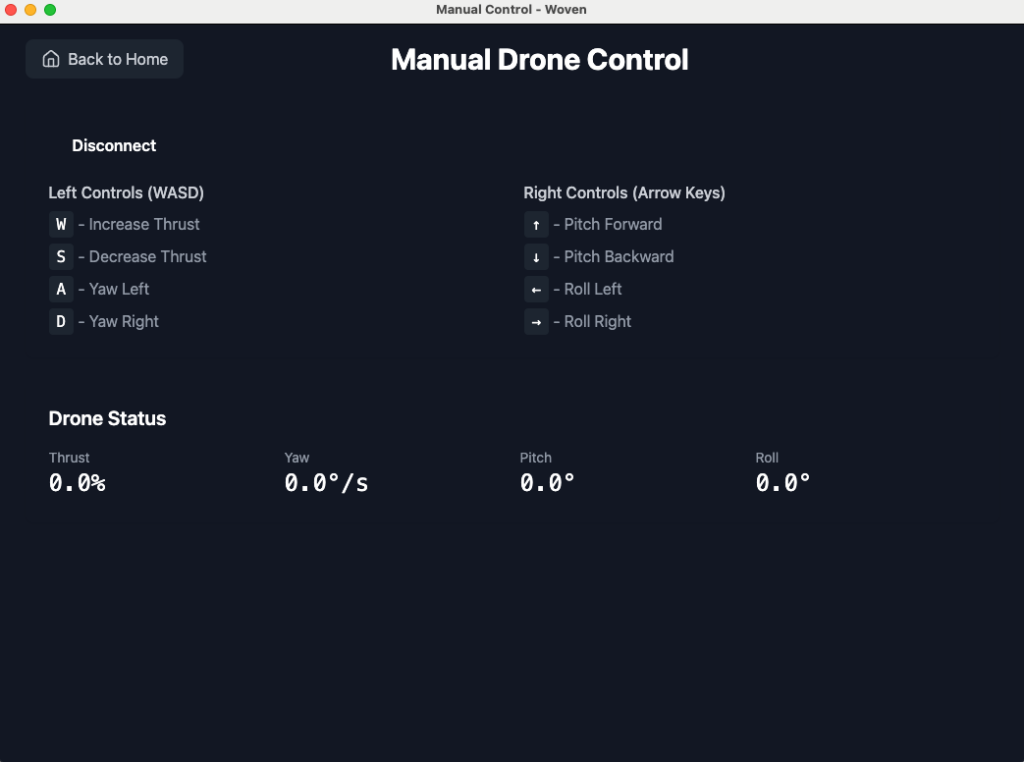
STEP 3: Now that your drone is calibrated and your battery is charged, it’s time to practice flying using manual control in the WovenDrone app. Use the image below to familiarize yourself with the control layout. Start by experimenting with the left and right side controls—one side typically manages thrust and yaw, while the other controls pitch and roll. Spend time getting used to how the keys respond. While the key bindings in the app cannot be changed, you should still focus on developing comfort and precision with the default setup. Practice lifting off, hovering, and gently moving in different directions using your keyboard. The goal isn’t just to get the drone in the air—it’s to understand how it responds to your input so you can become a confident, steady pilot.
STEP 4: Now it’s time to bring everything you’ve learned together: soldering, circuit design, prototyping, and drone control. Your challenge is to build a fully functional, physical controller that uses tactile buttons connected through the MakeyMakey to fly your drone using the WovenDrone app. You’ll be building 8 total buttons—4 for the left-side controls and 4 for the right-side controls. Your final controller will use one or two perfboards (your choice), and you’ll mount them onto a piece of foam board or cardboard to create a full remote control layout.
- Start by sketching your design—what shape will your controller be? Where will each button go?
- Once you have your idea, prototype it on a breadboard using buttons and jumper wires to make sure it works.
- Only after testing your layout on the breadboard should you begin soldering onto the perfboard. Each button will act as a switch—when closed, it completes a circuit to the MakeyMakey and triggers a keypress. You can wire all grounds to a single “Earth” pin on the MakeyMakey, just like you did in earlier builds.
- If you want to go further, you can even add LEDs that light up when each side is pressed—just make sure the LED is wired in a way that activates with the switch. This is a complex and creative challenge, and your finished controller will be a real, working remote for your DIY drone. Don’t rush. Don’t get frustrated. Prototype first, then solder. You’ve got the skills—now build something awesome.
Once your DIY drone remote is working successfully, take a clear photo of your remote setup and upload an image you’re proud of using the QR code below. In the “Subject” area, include your first name and/or your team members’ names. Click here to see all uploaded medi