Part 1: Microbit Overview
Part 2: Microbit Controller
Part 3: MakeyMakey Instrument
Part 4: Raspberry Pi Manual Dexterity Trainer
Part 5: Final Showcase
D: Microbit Design Challenges
CHALLENGE #1: STEP COUNTER
Instructions (Part I): View the below video to familiarize yourself with the concept of a step counter.
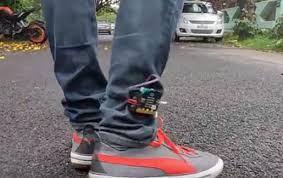
Instructions (Part III): Develop a system for attaching your step counter to your body. See a few examples below.


Instructions (Part IV): Once your step counter is functional, experiment with different variations and combinations of the code (e.g., “Shake,” “Logo Up,” etc.) to create the most accurate step counter. Test it by walking a set number of steps and then checking the Microbit output until it most accurately represents the actual steps you counted.
Instructions (Part V): Once you are satisfied with your step counter, ask a partner to record a video of you walking and then a close-up of your Microbit’s reading. Upload your video below. In the “Subject” area, type your first name. In the “Write something…” area, describe the code you created that resulted in the most accurate step counter. A QR code is provided for ease of upload.

CHALLENGE #2: INCHWORM
NOTE: If your inchworm does not move when connected to the battery pack alone, try connecting it to the USB, imagining that the cord is a “leash” for the worm. If it still doesn’t move, begin the next lesson.
Instructions (Part I): Now that you have a foundational understanding of how to create and upload code to your Microbit, let’s integrate a ServoMotor to build an “Inchworm.” For a clearer understanding of what we’re aiming for, carefully watch the video below!
Instructions (Part II): Click here and follow the instructions for connecting your ServoMotor to your Microbit. Please note that you will NOT need to complete steps 1-7 as your cables have already been modified for you as shown in the image below.

Instructions (Part III): Click here, scroll down, and follow the “Make. Code. Connect” instructions shown in the image below. Additionally, the code listed in the instructions above is for one “step” of the inchworm. Experiment with variations of the code below to create more than one step.


