Instructions (Part I):Experiment with the music making capacities in Scratch. Follow each coding “card” provided, then create, and play, your own modified version. The specific function of each code is written underneath.
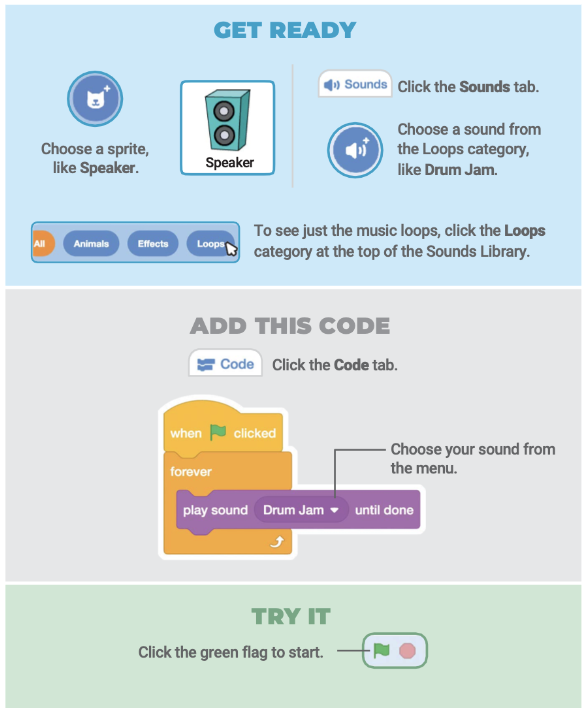
Play a Drum
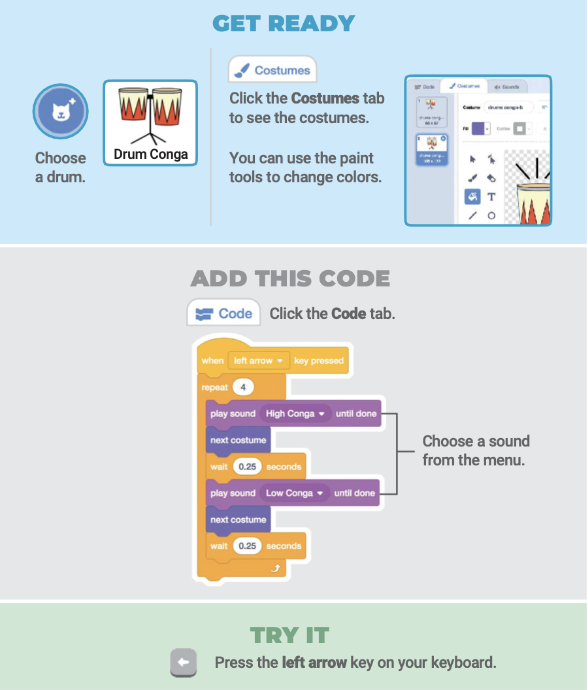
Animate a Drum
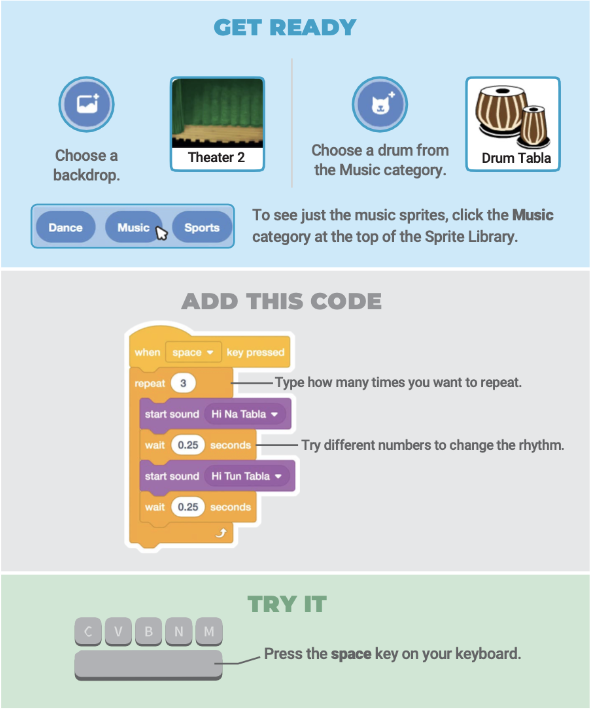
Make a Rhythm
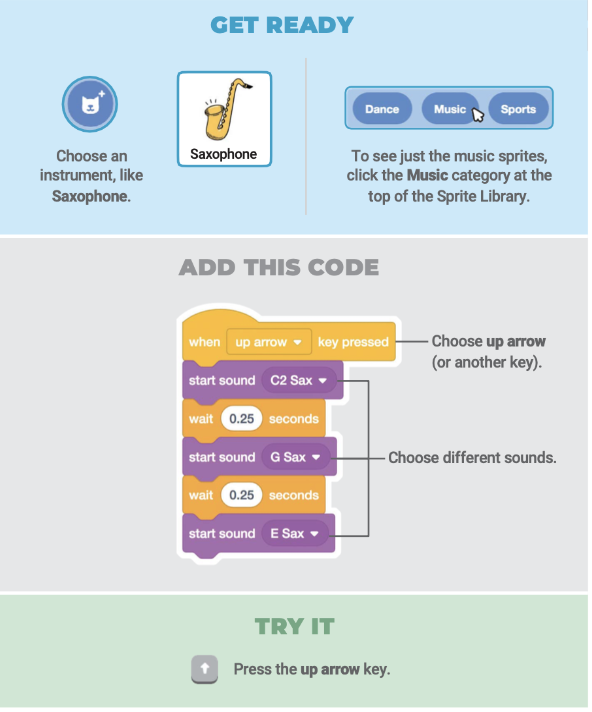
Make a Melody
Play a Chord
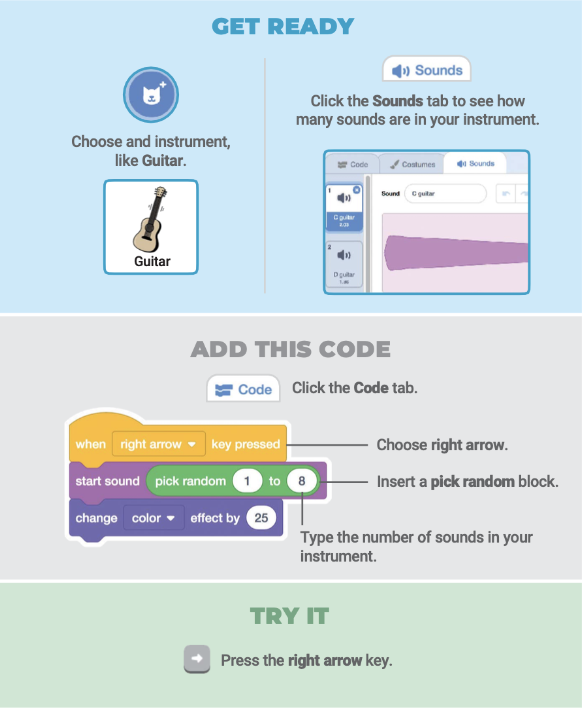
Surprise Song
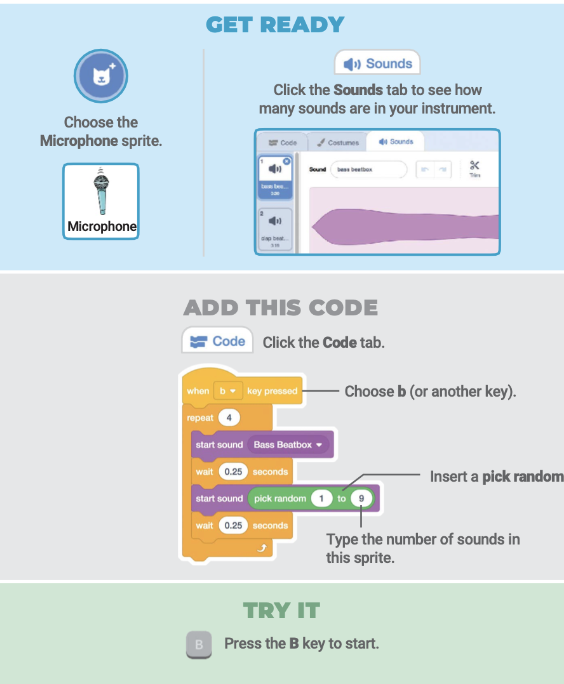
Beatbox Sounds
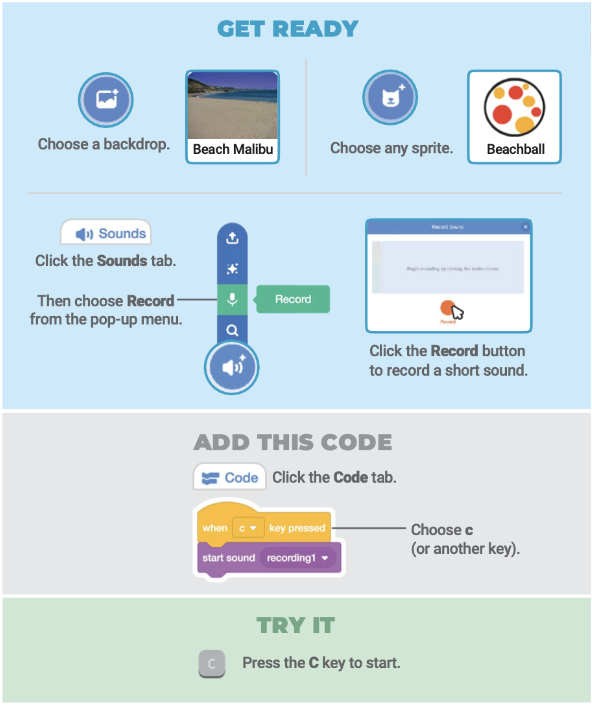
Record Songs
Play a Song
Instructions (Part II):Using what you learned above, build your own musical instrument in Scratch. Your instrument must include the following. a) Have a backdrop. b) Include at least 2 different sprites. c) Leverage at least 4 different key presses. d) Involve both stock and recorded sound. Save your instrument as we will revisit it later this week.
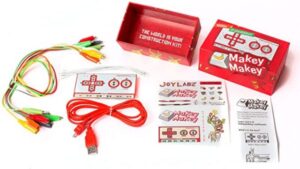
Instructions (Part III): Open your MakeyMakey kit and and carefully lay out all of the materials. See the below image.
Instructions (Part IV): Carefully view the below introduction videos to obtain a general idea of what the MakeyMakey is capable of.
Instructions (Part V): Carefully study the below videos to learn how to set up and begin using your MakeyMakey. You might find this resource helpful as well.
Instructions (Part VI): Carefully study the below videos to learn how to create MakeyMakey switches and buttons.
Instructions (Part VII): Carefully study the below videos to learn how to use the back side of the MakeyMakey board.
Instructions (Part VIII): Using the above videos as a guide, and the materials in your kit, build a MakeyMakey controller for the Scratch musical instrument you created in “Part II” above. Record a video of you playing a song with your MakeyMakey controller and upload it below. Type your first name in the “Subject” area. A QR code is provided below for ease of upload.